
How to Contour Your Face: Step-by-Step Guide
You don’t need a 20-step process or reality TV fame to get sculpted cheeks.
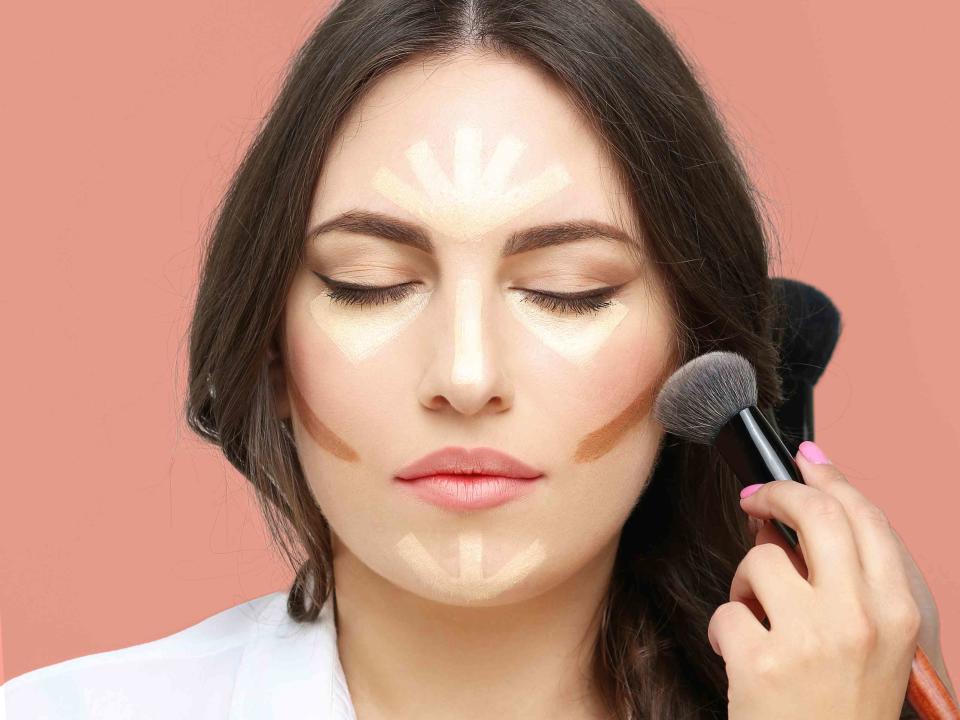
VLG/Getty Images
I am the not-so-proud owner of what I lovingly refer to as a thumb face. Yes, it may be a bit dramatic, but I do have a particularly round face that does few for my cheekbones and jawline. As a result, I’ve become a bit of a professional when it comes to contouring—even before I had a name for it, I was using makeup to sculpt and add definition to my otherwise chisel-less face.
That means I also know the perils of contour gone wrong—streaky lines down cheeks, muddy chin-straps, and all. But between today’s keenly formulated products, precise tools, and unprecedented access to professional makeup artists via social media, we no longer have to trial-and-error our way to the perfect contour. Indeed, everyday contouring can be mastered in just five easy steps. Read on for our fool-proof tutorial to your best sculpted face.
How to Contour Your Face: Step-by-Step Guide
1. Choose the Right Product
A great contour ultimately comes down to choosing the right product, both in terms of consistency and tone. Oilier skin types should stick to powder formulations like the Make Up Forever Artist Longwear Skin-Fusing Contour Powder ($32), while those with normal to dry skin have a bit more flexibility—they can use a cream contour, like the Milk Makeup Sculpt Cream Contour Stick ($24), or a liquid contour, like the Charlotte Tilbury Hollywood Contour Wand ($42). For longwear, consider setting a cream or liquid formula with a powder.
Perhaps more important that consistency is finding the right tone. While you could technically use a bronzer to contour the face, there’s a reason the two are considered separate steps. While bronzers are meant to warm up the skin, contours are meant to mimic and enhance the natural shadows of the face. As a result, bronzers tend to lean warmer with an orange-y undertone, while contours should be cooler, with more of a gray undertone. Danessa Myricks’ Balm Contour ($28) features a stellar cool-toned color range with whopping nine different options.
And a quick note on application: While you can certainly go straight onto the face with a contour stick, we generally suggest picking up some product on a dense buffing brush and stamping it onto your face—not only will this give you more control and precision, but it’ll also help you avoid that dreaded streaky contour line. Brush-wise, we’re fans of the Sephora Collection PRO Contour Brush #78 ($30), which features a short-bristled dome shape that helps evenly distribute product. To blend, you can either use that same brush or opt for a fluffier option, like the larger side of the IT Cosmetics Heavenly Luxe Complexion Perfection Brush #7 ($50)—it really just comes down to personal preference.
2. Carve the Cheekbones
Starting just above the cheekbone, or around where your sideburns start, draw a diagonal line going down, ending in the middle of the cheek. Use light pressure—you can always build up the color later, and harsh, severe lines are notoriously difficult to blend out. Also, be sure to keep the contour on the side of your cheek, stopping before you hit the iris of the eye; any further and you risk ruining the illusion.
Blend out your contour, lightly buffing until there are no harsh lines. Per makeup artist Dani Parkes, use upward strokes to lift the face and avoid dragging down your contour. And remember, it’s always better to overblend than underblend. Repeat on the other side.
3. Define the Hairline
Defining the hairline can either elongate or shorten the face depending on your technique. To shorten the face, apply contour to the forehead, sweeping the product back and forth along your hairline from one temple to the other in an upside-down U shape. Lightly build up the color with a light touch, using an even-lighter touch at the center of the forehead and along the temples. To create a really natural, flawless finish, blend lightly up into the hairline.
To elongate the face, apply contour to both sides of the hairline without connecting them in the middle. Be sure to use light sweeping motions and blend slightly into the hairline to make it look more natural. Then, add a short diagonal line on your temples, around where the eyebrow ends, up into the hairline.
4. Chisel the Jawline
Using short lines and light strokes, shade just under or along the edge of the jawline—again, this is largely based on personal preference so play around with your placement until you find what you like. Start from the base of the jaw all the way to the chin (and then back toward the base of the jaw on the opposite side) and blend down in this case, slightly extending the product down the neck.
5. Sculpt the Nose and Eye
Contouring is always optional, but this step is particularly so—I usually sculpt the eye but skip out on my nose. Pick up some product on a fluffy eyebrow brush—we usually look for something like the Sigma E25 Blending Brush ($17) because we can load up product on both sides and really carve out the eye, but a dome-shaped brush will work just as well—and run the brush along the crease of the eyes, using small circular motions to buff it out. To contour the nose, Parkes suggests following that crease line down from the inner eyelid, just below the brow, onto the nose, using it as an imaginary guideline. Don’t apply product past the tip of the nose. The closer your lines are to the bridge of the nose, the more cinched the effect. Repeat on the other eye and other side of the nose. If you’d like to sculpt the tip of the nose, use your brush to create a light horizontal line connecting the two parallel lines just above the tip.
For more Real Simple news, make sure to sign up for our newsletter!
Read the original article on Real Simple.

