
Learn How To Decoupage and Up Your DIY Game
With a froufrou name like decoupage, you might expect the charming DIY craft to be as difficult as keeping your kids' rooms decluttered. But all it really involves is cutting out pictures or designs from magazines, greeting cards, fabric, and the like and pasting them on to personal goods with glue. It's about as simple as it sounds and seriously entertaining for any age, so it's a fun thing to do at home for everyone from Grandma to the littles. It doesn't require a ton of supplies, or any expensive ones, and only a small workspace. With a bit of prep, this is a craft you can do on the kitchen table. Move over, meatloaf! It's also a great way to add character to larger pieces like furniture (also check out our guides on how to distress furniture and how to paint furniture).
Decoupage's name evolved from the Middle French word découper, meaning to cut up, carve, or cut out, though the technique's roots go back to East Siberia and China. By the 12th century it had made its way to Europe, with the French originating the classic style we see today some 500 years later. While it was once a method employed by professional artisans, nowadays it's an extremely popular craft made easier thanks to nifty decoupage products, such as Mod Podge.
Decoupage Mediums
Mod Podge, and other decoupage mediums, like DecoArt Americana Decoupage Glue and Aleene's Collage Podge, act as all-in-one glue, sealer, and finish. They come in a variety of finishes, including matte, satin, and gloss. Mod Podge, probably the most popular, even offers a glitter version, so you can make your crafts glimmer almost as brightly as a disco ball. There are also specific mediums for furniture and outdoor projects available. Or, you can use the old standby, Elmer's School Glue—just mix it with with equal parts water.
Decoupage Objects
The only other necessities you need before embarking on your decoupaging adventure are the item you want to personalize and the images you want to use. Wood is a popular surface to decoupage, but with the right adhesive (check the label before buying), you can also work with metal, plastic, and glass. Newbies might want to start off with easier objects like bottles or trays, but you can decoupage almost anything in your home, including:
Frames
Furniture
Boxes
Dishes
Vases
Photo albums
Lamps and lampshades
Cans
Bird houses
Mirrors
Decoupage Images
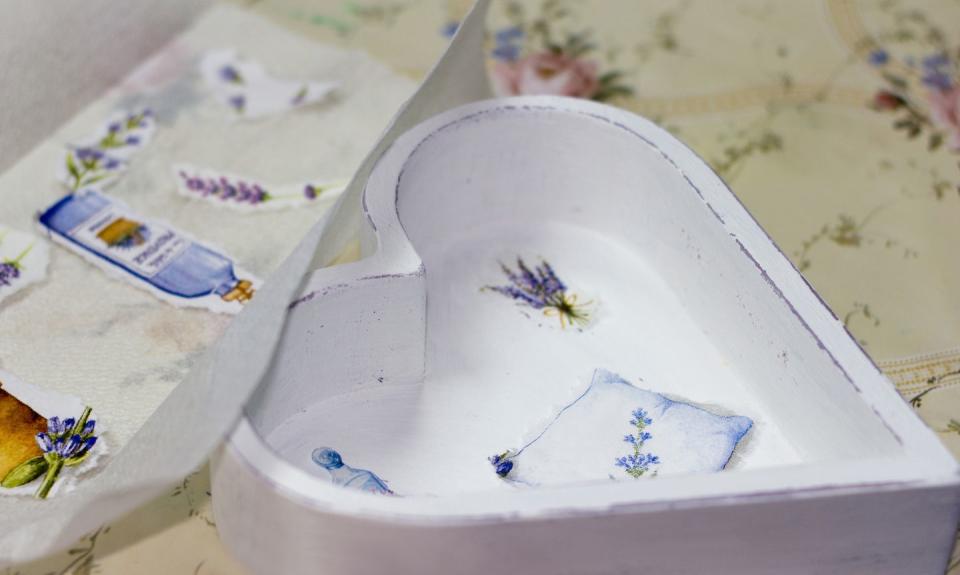
The pictures and designs you use for your project can come from just about anywhere, including wrapping and tissue paper, wallpaper, paper napkins, post cards, paper doilies, seed packages, book pages, dried flowers, ribbon and the ever-popular gold foil. You can also print out clip art and other downloadable images. There's even a wide range of paper made specifically for decoupaging available. See? Easy peasy.

If you want to get personal and use cherished photos and other 2-D mementos, photocopy the original and decoupage with the copy. Just be sure to use a laser printer rather than an ink-jet printer to prevent smearing, or let the ink dry and give it a good spritz with hair spray for protection before applying the medium.
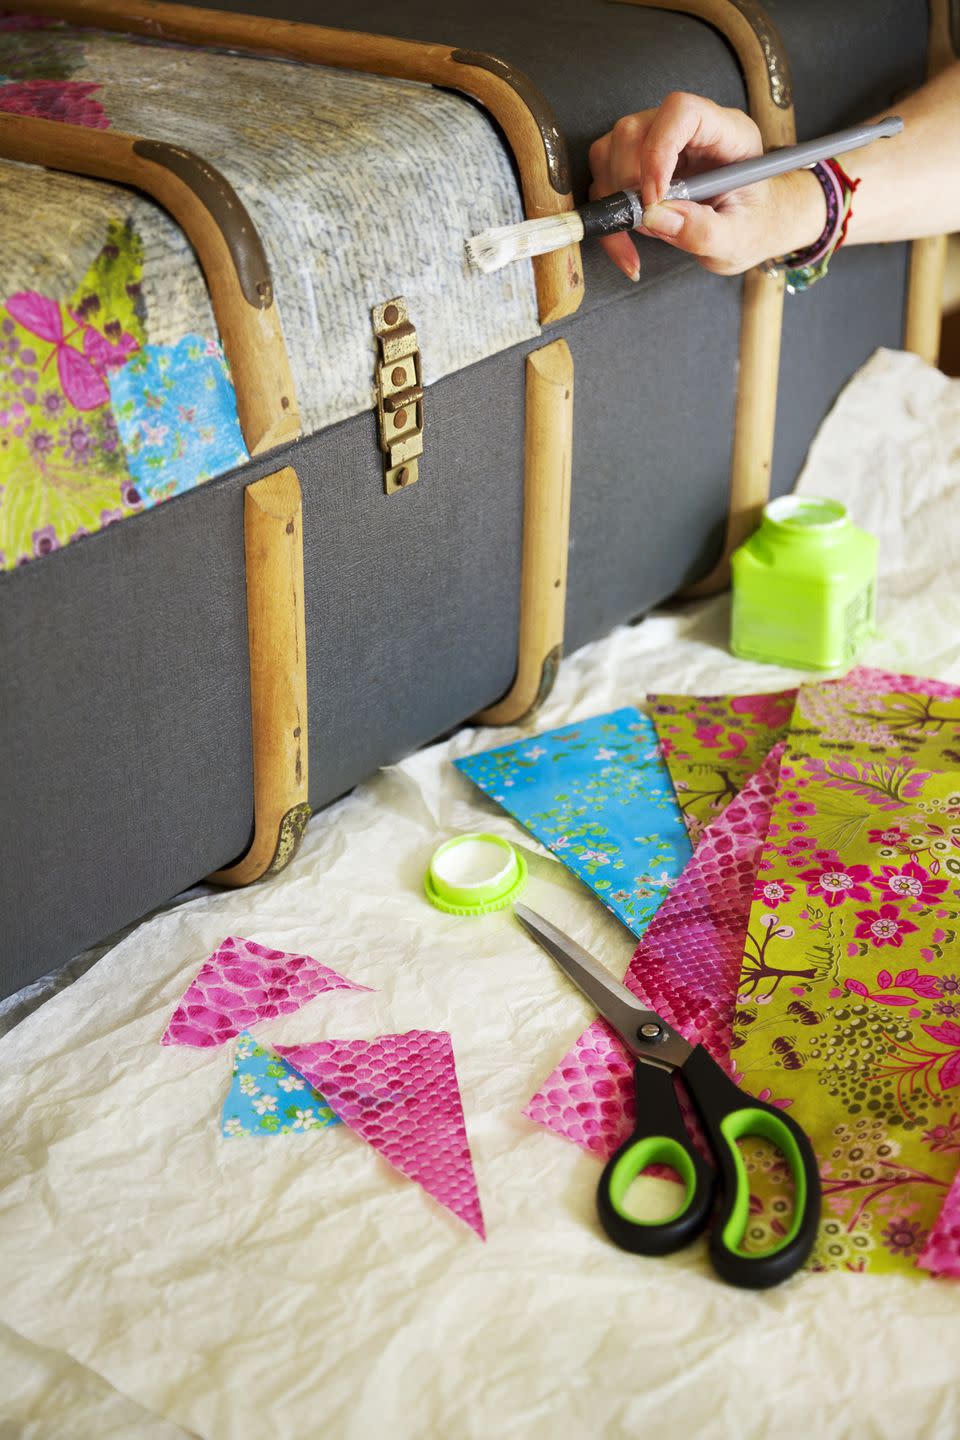
Decoupage Supplies
Of course, there are some other supplies that will help ensure your first go at decoupage is a sparkling success that you'll be proud to show off to your whole squad. You probably have most of these tools squirreled away in your cabinet, but if you don't they're all reasonably priced:
Brayer or Bone Folder: These oddly named but handy little utensils will help get rid of excess adhesive and the dreaded wrinkles and bubbles.
Scrapbooking Scissors and Craft Knife: They'll allow you to cut more intricate designs, with cleaner edges.
Foam Brush: Ideal for spreading the decoupage medium, they're also less expensive than regular paint brushes.
Tweezers: They'll be a big help when you're trying to get smaller images into position.
Damp Cloth: You'll need this to wipe off extra glue, but make sure it's not soaking wet so it doesn't flood your project.

Decoupage Technique
After you've gathered up your DIY decoupage devices, it's time to get crafting with pretty paper!
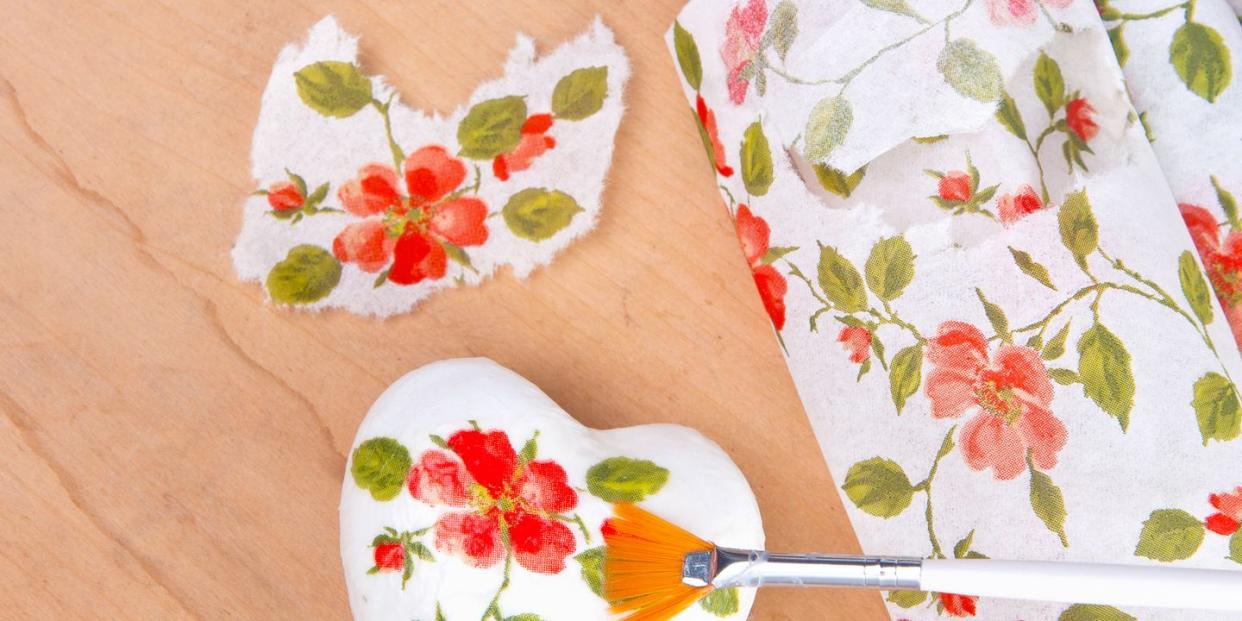
Begin by carefully cutting out the images you wish to use in your project. Take your time and consider using die cuts if this your first time out. If a white border is showing around the edge of the picture you've cut out it's okay to get a little sneaky and color it in to match the background or the picture.

Next, give the object you've chosen to decoupage the once-over with a damp cloth, removing any debris, dirt, or dust. Just be sure it's completely dry before you begin using the decoupage medium. You can also paint whatever you're decoupaging—give it plenty of time to dry thoroughly—or even sand it to rough up the surface if it's slick.
Choose the arrangement of the images before spreading the first layer of glue. This is one of the most creative steps. Don't rush it.
Once you've decided on the look you want to create, remove the images and slather the medium on to the surface of the object. Lay an image in the glue, working with tweezers if it's small. Use your fingers or the brayer or bone folder to push the excess glue out and get rid of any air bubbles or wrinkles. Work from the center of the image to the outer edges.

Repeat this process until all of the images are glued to the object. Let them dry, keeping in mind that thicker paper can take longer to dry. If bubbles arise as the decoupage dries, pop them with a pin. Smooth the surface using your fingers or tools.
Coat with a second layer of the medium, let dry, and then continue to add coats until the surface of the decoupage is completely even. You shouldn't be able to feel the edges of the images. Let the object dry and then enjoy!
Having trouble getting a smooth finish on your decoupage? Be sure to use a sponge brush to avoid brush strokes and don't stir or shake the medium, which can cause bubbling when you apply it. If the decoupage has dried, wet a very fine grit sandpaper (400 will work) and lightly sand the uneven spots. You should be able to sand Mod Podge and glue with no issues, but be aware that varnish may turn cloudy after sanding. It's best to test any surface before sanding—and always use a light touch. You can also sand in between applying the layers of medium.
You Might Also Like

